Cropping images with nothing but CSS
I ran into a dilemma while developing the Arroyo WordPress theme. Some post styles looked better with portrait-oriented photos, while most others looked best with landscape-oriented photos.
At first, I handled this by registering two images sizes: one landscape-oriented and one portrait-oriented. Using an incrementing operator and a conditional tag, I was able to output the correct photo orientation on the correct post styles.
However, I also wanted Arroyo to support Infinite Scroll, like all of our other themes. I couldn’t quite figure out how to get incrementing operators to work with the Jetpack rendering filters.
This forced me to find a CSS-only way of “cropping” a landscape-oriented image to become a portrait-oriented image. Luckily, I discovered a pretty simple way of doing just that, which means I could ditch the messy PHP and support Infinite Scroll at the same time. ?
Tl;dr: Contain an unconstrained image inside a div with overflow: hidden;
Find a landscape-oriented image
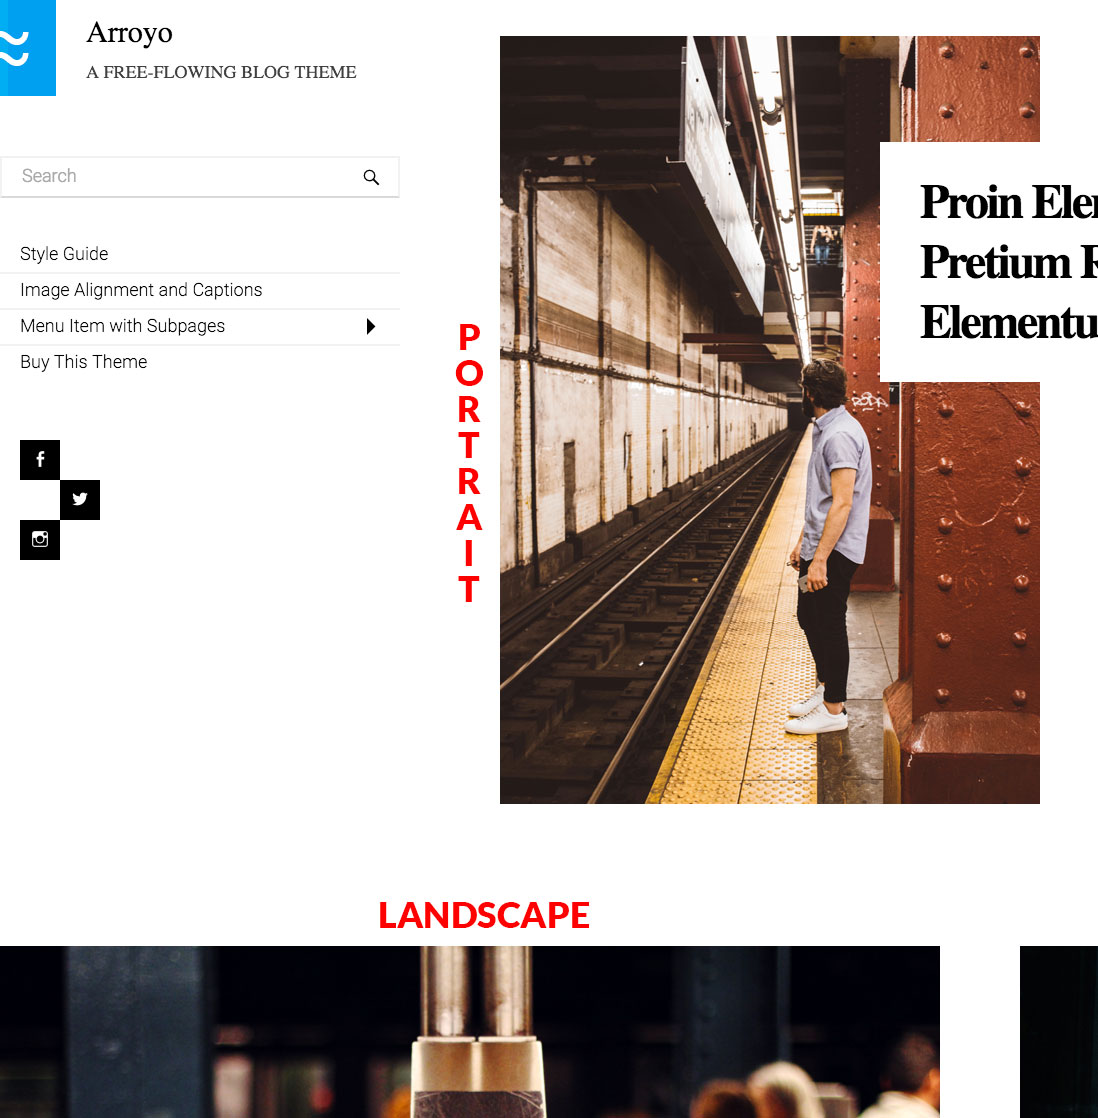
Since most of the post thumbnails in Arroyo look best when landscape-oriented, we’ll start with a landscape-oriented photo, then use our CSS image cropping technique to turn it into a portrait-oriented photo.

Wrap the image in a div
The markup to set up CSS-only cropping is super basic. All you need to do is wrap the img tag in a div.
<div class="side-crop">
	<img src="pug.jpg" alt="pug wrapped in a blanket">
</div>
The pug image is 750 pixels wide and 500 pixels high. Let’s make it portrait-oriented by maintaining the 500 pixel height, but chopping the width in half to 375 pixels.
We’ll do that with the following CSS code:
.side-crop { max-width: 375px; overflow: hidden; }
.side-crop img { max-width: initial; /* Maybe optional. See note below */ }
Here’s the same pug image with the above CSS applied.
Voila! A pure CSS image crop.
Note: It’s very common for max-width: 100%; to be blanket applied to all img tags in WordPress themes. This is used to prevent images from extending past the container.
In this case, that’s exactly what we want. A big image can’t break the layout because we’re wrapping it in a div with hidden overflow.
But I want to see the entire pug’s face!
In the above example, our pug’s face is being cut in half. Rest assured, we can adjust this crop positioning with a little negative text indent.
Let’s add the following CSS code to adjust:
.side-crop { text-indent: -140px; }Now our pug’s face is fully visible in all its blanket-wrapped glory. ?
Crop Positioning the Unknown
Unless you had facial recognition software that worked for dogs, there would be no way to find that -140px number without manually measuring it out.
This can pose a problem for certain photos, but it’s an inherent issue with any sort of “dumb” automatic cropping technique.
However, here are a few handy CSS tricks you can use to crop position the unknown, namely, percentage-based negative text indents.
In the example below, we’ll use text-indent: -50%; instead of text-indent: -140px;
This will crop the left and right sides equally, essentially a “center” crop.
This would work best if all the photos had subjects in the center, like the pug photo. But this would be nearly impossible to anticipate when you’re releasing a theme to the world.
In Arroyo’s case, we decided to just let it crop the right side off in all cases. Users can style specific post classes to target particular photos they have issues with. (Contact our support if you need help with that!)
Interestingly enough, text-indent: -100%;, which crops the left instead of the right, is equivalent to direction: rtl;, typically used for changing text direction for right-to-left languages.
Vertical Cropping and Positioning
A blog theme that has varying image orientations is, admittedly, a pretty unusual use case.
I whipped up a quick example of another case where this might come in handy. Note that this uses vertical cropping instead of horizontal, but it’s the same concept nonetheless.
See the Pen Vertical Cropping by Leland Fiegel (@leland) on CodePen.
Instead of a max-width, we use height to crop vertically. And instead of negative text-indent, we use negative margin-top to position it.
We might as well have used negative margins for the horizontal cropping as well. There’s more than one way to skin a cat.
Downsides
One of the most glaring downsides is that you could potentially be loading a gigantic image, of which only a small portion is visible.
This is a waste of bandwidth.
If you plan on using this technique, try to at least resize your images down to a point where not too much of it is “wasted” on the hidden portion.
To handle this in Arroyo, I made sure to load the “Large” image size, as opposed to loading whatever size the user uploaded (which could be potentially gigantic).
By default, this image size no greater than 1024×1024. It also gives the user extra flexibility, as the “Large” image size dimensions can be set in Settings → Media.
Conclusion
I realize that when you woke up this morning, you probably weren’t thinking “man I wish someone would write a blog post on how to crop images with only CSS,” but hopefully this comes in handy for someone else in the future. 🙂
Another point of this blog post is to show you that sometimes a seemingly complicated problem can be solved with a very basic, obvious solution.
When I was brainstorming how to fix this, I researched JavaScript libraries, relevant WordPress functions, and just way overthinking it in general.
In the end, all I needed was some dead simple HTML markup with a couple extra lines of CSS.
If you’re interested in further reading about manipulating photos with CSS, read the Crop Top article on CSS Tricks.